| Modeling/ Recording and Executing Macros |
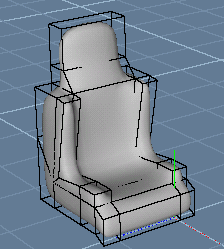
Recording and Executing MacrosWhen you use the program in the macro recording mode, all actions are recorded into the current macro. Current macro can then be executed, for example, to speed up a certain modeling task. You can also rename the current macro to create a named macro and bind the named macro to keys, buttons or menus. This tutorial shows how macros can be recorded and executed. The GUI chapter of the manual explains how to bind macros to the components of the user interface. Chairs for a trainIn this tutorial, we create one chair and record a macro, which duplicates and moves the chair. Then we execute the macro a couple of times to get a row of chairs. 1. Create a chair and make sure it is selected.
2. Switch to the top view and activate macro recording by selecting the Macros/Record pull down menu. This operation clears the previous current macro and enables macro recording.
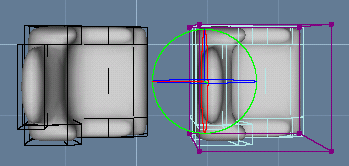
3. Select the 'Edit/Duplicate' pull down menu and use the Move tool to move the duplicated chair to get a second chair.
4. Now reset macro recording by selecting 'Macro/Record' again. Then select 'Macros/Execute' a desired number of times to create the rest of the chairs.
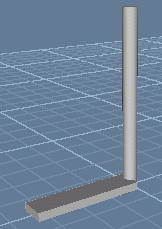
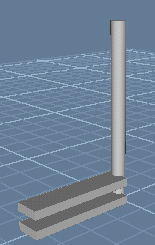
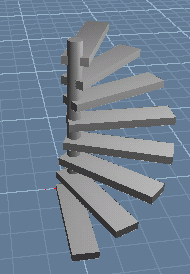
Rotate a viewWhen macro recording is activated, by default all applied actions are recorded to macros. For example, you can record a macro, which rotates the view window. 1. Set macro recording on 2. Rotate the view window by holding down the Alt key while dragging with the right mouse button. 3. Clear macro recording. Now hit the key combination 'Ctrl g' to execute the current macro (or select the pull down menu 'Macros/Execute'). The view window is rotated. Spiral stairsYou can record a macro, which first moves an object, then rotates the view and finally moves the selected object again. Such a macro contains two kinds of actions: those which are applied to the view window and those which are applied to the selected objects. Sometimes you don't want view specific events to be recorded into macros. Macro filters prevent actions applied to a certain target, such as the view window, being recorder to a macro. This tutorial demonstrates how to create 'spiral stairs' using macros. The idea is that each 'step' of the stairs can be created by duplicating, rotating and moving the previous step. These three functions can be recorded to a macro: The stairs are then built by executing the macro a desired number of times. 1. Create a cylinder representing the axis of stairs.
2. Create one analytic cube representing the first step.
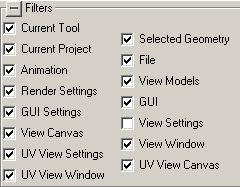
3. Go to the Select window's Macro tab (the third last one) and open the 'Filters' frame. By default, all macro targets are enabled. Reset the 'View Settings' check box to disable events, which change view orientation.
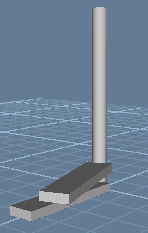
4. Activate Macro Recording. Make sure the 'step' object is selected and apply the 'Edit/Duplicate' pull down menu. This records the 'Duplicate' operation to the current macro. 5. Switch to the side view. Because macro recording for view window is disabled, view rotation is not recorded into the current macro. Move the duplicated step upwards using the Move tool.
6. Switch to the top view and rotate the duplicated step using the Rotate tool. We have now created the second step by duplicating, moving and rotating the first one.
7. Reset macro recording and make sure the second step is still selected. Select the 'Macros/Execute' pull down menu to create the third step for the stairs. Repeat 'Macro/Execute' a desired number of times to get all steps created.
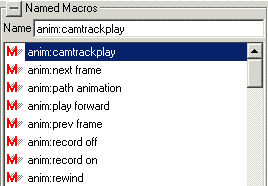
Entering points from a macroIn this example, we create a simple macro, which just enters a number of points through the view window. 1. Set macro recording on 2. Click the left mouse button several times in the view window. Nothing happens because you haven't activated any creation tool. However, these mouse clicks are still recorded to the current macro. 3. Disable macro recording. You have now recorded a macro, which simply feeds a number of points to the current tool, whatever it is. 4. Click the NURBS/Curve tool and hit the key 'Ctrl g'. A smooth NURBS curve appears to the view window. Click 'Accept' to finish the tool. 5. Activate the NURBS/Curve tool again. This time set the order to 'Polygonal'. Then execute the current macro and click 'Accept'. A polygonal NURBS curve is created through the recorded points. Activating tools from a macroYou can record a macro, which only activates a tool, but lets you interactively define the necessary points for the tool. The purpose of such a macro is to save the work of selecting the suitable tool options. 1. Set macro recording on. 2. Click the desired tool and set suitable tool options through the control bar. 3. Disable macro recording and cancel the tool. Hit the keys 'Ctrl g' to activate the tool with the specified options. Creating named macrosThe latest recorded macro is named as 'current' by default. Whenever you record a new macro, the old current macro is destroyed. If you want to keep a macro more permanently, you have to rename it. This can be done as follows: 1. Record a macro as described in the previous examples. 2. Go to the select window's macro tab and open the 'Named Macros' frame.
3. Activate the 'Name' field, enter a new appropriate name and hit Enter.
Executing a named macroYou can execute any named macro by dragging & dropping it into a view window. If you want to repeat a macro multiple times, just select it from the named macro list, enter a suitable count to the 'Repetitions' field and click the 'Apply' button.
|
 |
 |
